Park Tech: How to use google maps to create Online Map Layers for your park or open space

Image of Cotteridge Park’s Online Map Layers – found at: https://cotteridgepark.org.uk/history/map/
You will need:
1. A gmail account. With every gmail account you can create and share maps. Many groups already have gmail accounts to help them run their organisation or their website. If you don’t go to https://www.google.com/intl/en-GB/gmail/about/# and create an e-mail account. (Remember to share the password with at least one other member of your group.)
2. A laptop or a desktop computer. Ideally with a modern browser – google chrome is good. At the moment (April 2019) you can’t edit google maps on a mobile device.
3. A good hour or two. To get you started and growing in confidence. Perhaps try it out with a friend alongside you. Remember you can go back and edit, so think of the map as a constant work in progress.
4. Incognito window for your browser. Go to file at the top of you browser and chose the ‘New Incognito Window’. This is effectively looking at the internet through strangers eyes (ignores anything you are logged into). If you test your map in the incognito window you will see what other users will see.
How To: Create and Edit your Google Map
1. Creating The Map
You’ll need to login to gmail account To do this, go to www.google.com and click ‘sign in’ at the top right

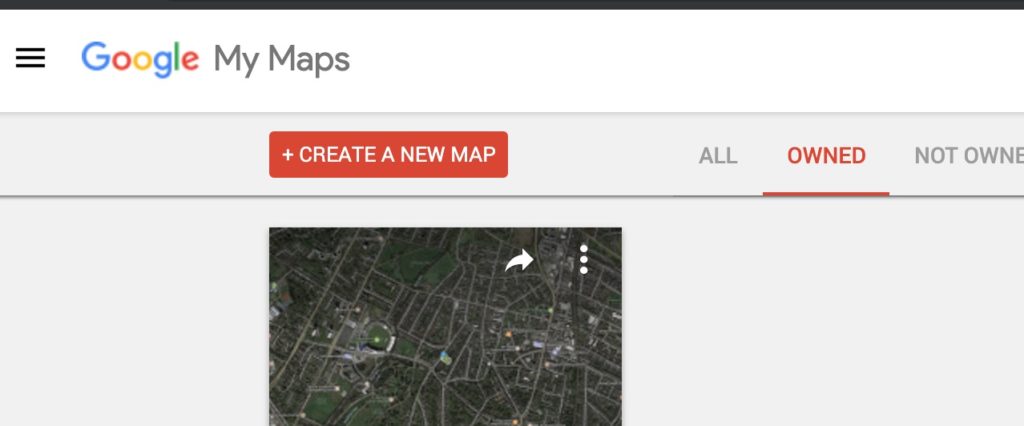
Once signed in, head to www.google.com/mymaps, where you need to create a map, using the red button (you will only need to create your map once, after that you share it with other so they can add information). Give it a name like – Our Park’s Name Map – make the name descriptive, that helps when searching for it. You will see your map listed under ‘owned’ maps:
If in doubt, when you next visit www.google.com/mymaps you can choose ‘all’, if you can’t find the map you probably are not logged in with the right gmail account.
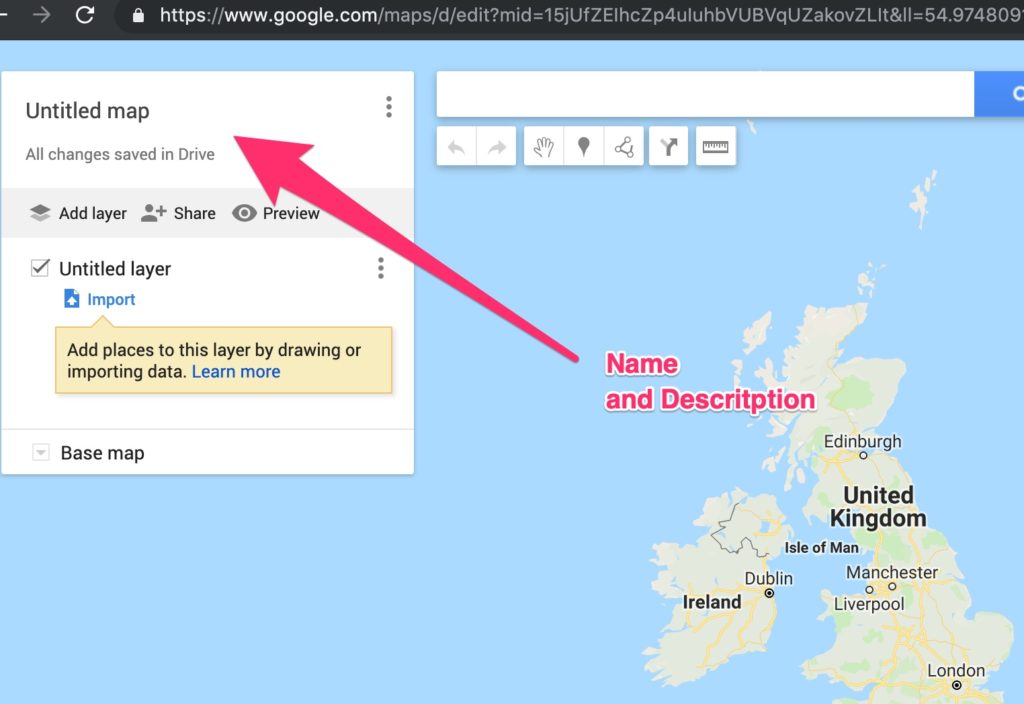
Click on your map to open the editor – once you have done this you will see a familiar looking Google Map, along with the editor / toolbar on the left hand side:
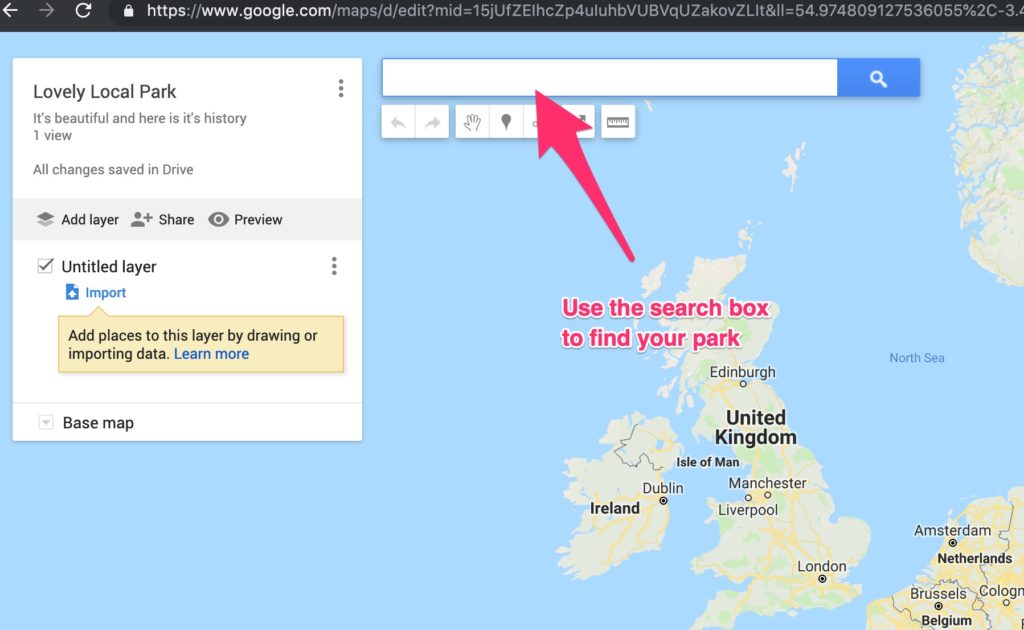
Use the Search Box to find your park.
2. Editing and adding layers to the map
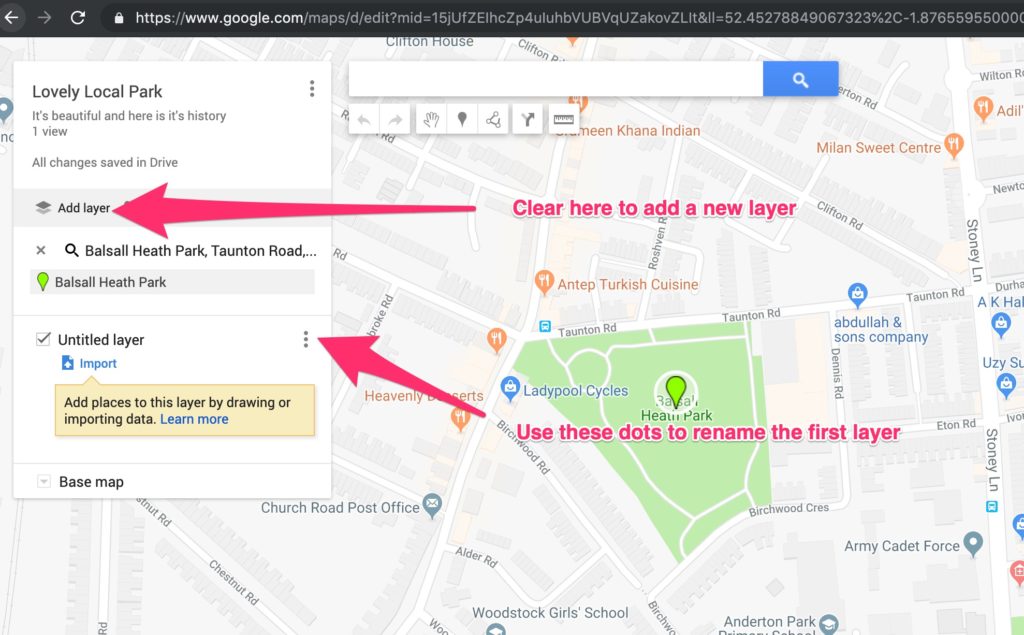
The map can have a number of layers – these have multiple markers within them (browse the Cotteridge Park Map to see layers). Think of the layers as a ‘categories’, currently the layers on the Cotteridge park map are ‘buildings’, ‘boulders’ ‘trees’ and ‘events’. Just use the layers that suit your project. It could be sport spaces, interesting wildlife, history, anything that suits what you want to show
Each layer can have a number of markers and these can be pretty much anything you want. When you add a new marker you give it a title & description, you can include text, images, YouTube videos, and links to web pages.
To rename the first layer use the three dots. To add a layer, simply click on the ‘add layer’ button on the toolbar on the left. You’ll then see an ‘untitled layer’ appear. Click on the 3 dots menu to give the layer a name.
Now you’ve created a layer, you’re ready to start adding markers.
3. Add markers to the map
There are a number of ways to add a marker to the map.
Before adding a marker make sure you have selected the layer you’d like your marker to appear within by clicking on the layer name – you will see the blue line on the left to indicate the layer is selected. (If you forget to do this, don’t panic as you can drag and drop markers from one layer to another).
Once you’ve selected your layer, zoom into the point on the map where you want to add a marker and click on the add marker tool:
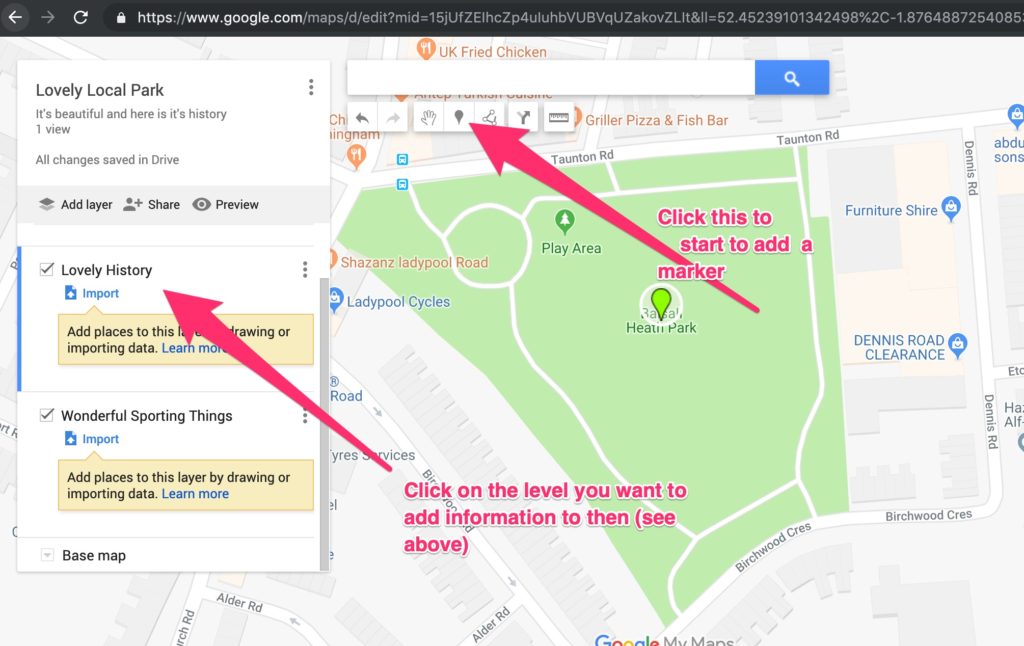
Your cursor will change to a ‘+’ symbol and you can click where you want the marker to be placed – you’ll then see an info box appear and your new marker (or point as they’re now called!) will appear. Here you have the option to name it and add a description:
Give your marker / point a name and brief description and click ‘save’.
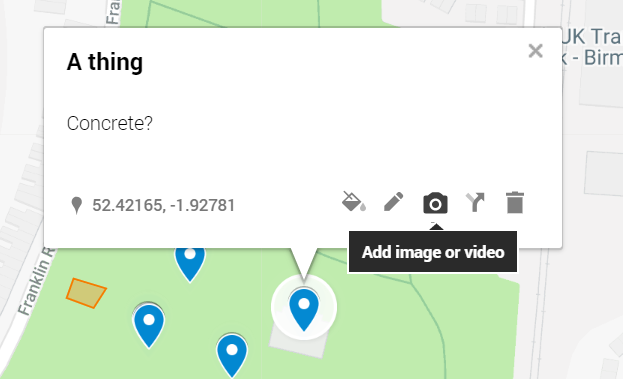
Once you’ve saved the point, you will see it on on the map and you also have a number of icons:
![]()
- The longitude & latitude (GS coordinate) of your point (for reference).
- The style tool which allows you to change the colour & icon of your point.
- The editor that allows you to edit the name & description and add text to the point.
- The photo picker which allows you to add photos / videos to your point.
- The direction tool which lets you get directions to this point in google maps.
- The delete tool which allows you to delete your point – you cannot undo this action!
Note: If your marker / point needs to be in a very specific location, you can find the longitude and latitude (GPS coordinate) of the item and paste it into the search bar – this then gives you an ‘add to map’ option to create your point:

4. Adding an image to your map’s markers / points
Once you have created markers / points on the map, you may want to add more than just text. To do this click on your marker and the info box / balloon will appear – here you need to click on the photo picker icon (number 4 in the list / image above):
Next you are presented with a number of sources you can insert a photo from:
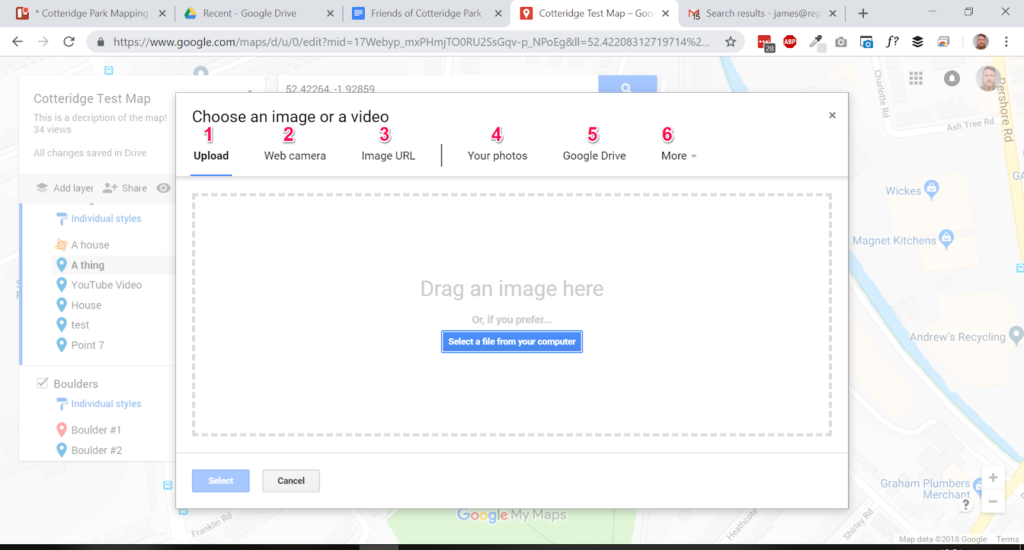
- Upload – this allows you to choose an image from your computer’s hard drive and upload it to your map. Images uploaded needed to be quite small in file size, so aim for under 2mb, or they may be rejected when you try and upload them. This upload feature can also be a little temperamental, so if an image fails to upload, try a couple more times!
- Web camera – unless you need to take a photo of yourself, you probably won’t need this option!
- Image URL – this allows you to link to / use an image hosted on an external website. Whilst tempting, we advise against using this option as images you are not in control of can be deleted or blocked and will then disappear from your map.
Linking to images on larger established sites such as Wikimedia Commons is less of a risk – however it’s just as easy to download images from here, upload them to the map and include the required credit in the description text. - Your Photos – this relates to the Google Photos product and will only be useful if your Google Account has an associated photos account which some don’t.
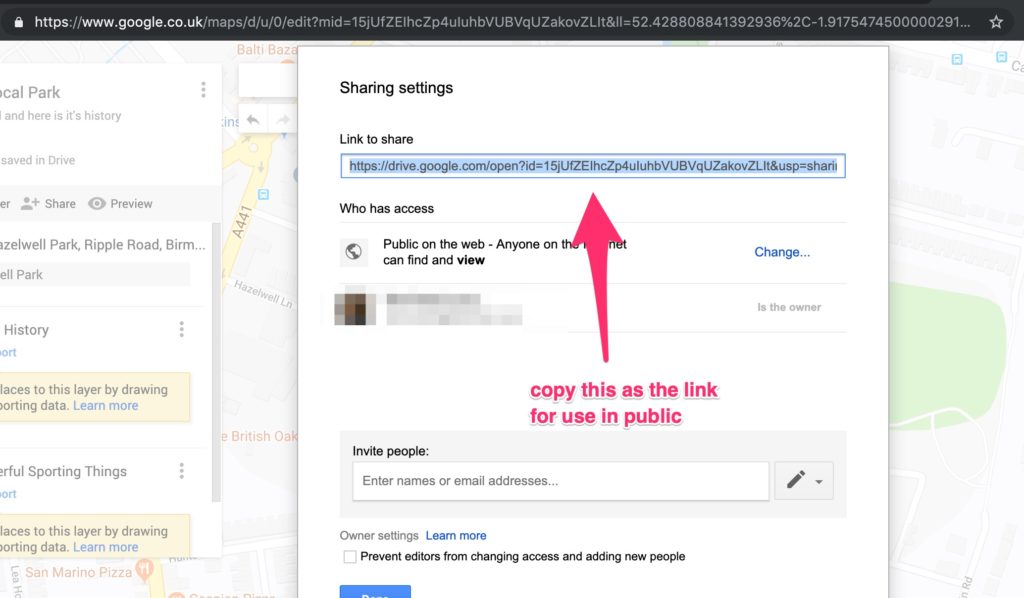
- Google Drive – this is probably the option you will use the most as it allows you to add images that are stored in your Google Drive account, or that have been shared with your Google Drive account into the map. You do have to make sure each picture has a share setting of ‘public on the internet’…
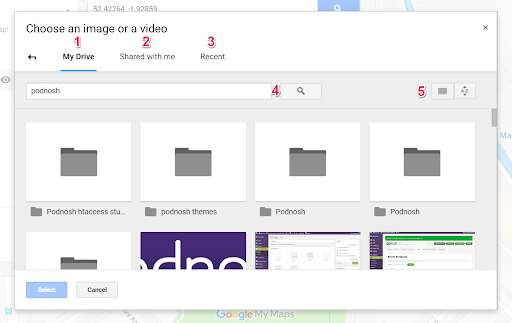
Once you have selected Google Drive, there are a number of options:
- My Drive – this shows you the entire content of your Google Drive which you can browse before clicking on your chosen image.
- Shared with me – this shows files owned by other Google Drive users that have been shared with you.
- Recent – shows files in your Google Drive that you have recently viewed or edited.
- Search – this allows you to type in a search query (followed by clicking the magnifying glass icon to submit your search term) and search your entire Google Drive for a file with a specific name.
- These icons allow you to change the view of your files from thumbnails to a list and also the order files are displayed in, A-Z or Z-A.
Once you have found the image you want to use, select it and click the blue ‘insert’ button on the bottom of the window – you will then see the image appear in your marker / point’s info box.
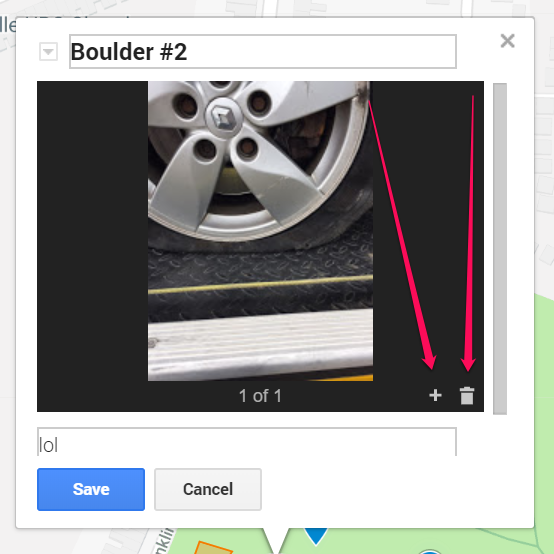
You can insert additional images by clicking the plus symbol in the info box and also delete images by clicking the bin/trash symbol next to it:
5. Adding a video (or audio) to your map’s markers / points
To add video or audio to the map we are going to stick with YouTube video for ease.
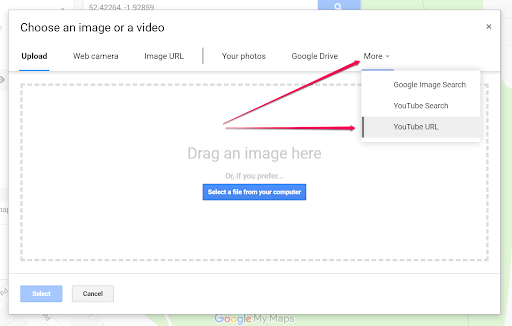
To add a YouTube video, click on the image / video picker icon as in the steps above, but this time select ‘more’ and then ‘YouTube URL’.
You will then need to copy and paste the URL of the YouTube video you want to use into the box and wait for the preview to appear:
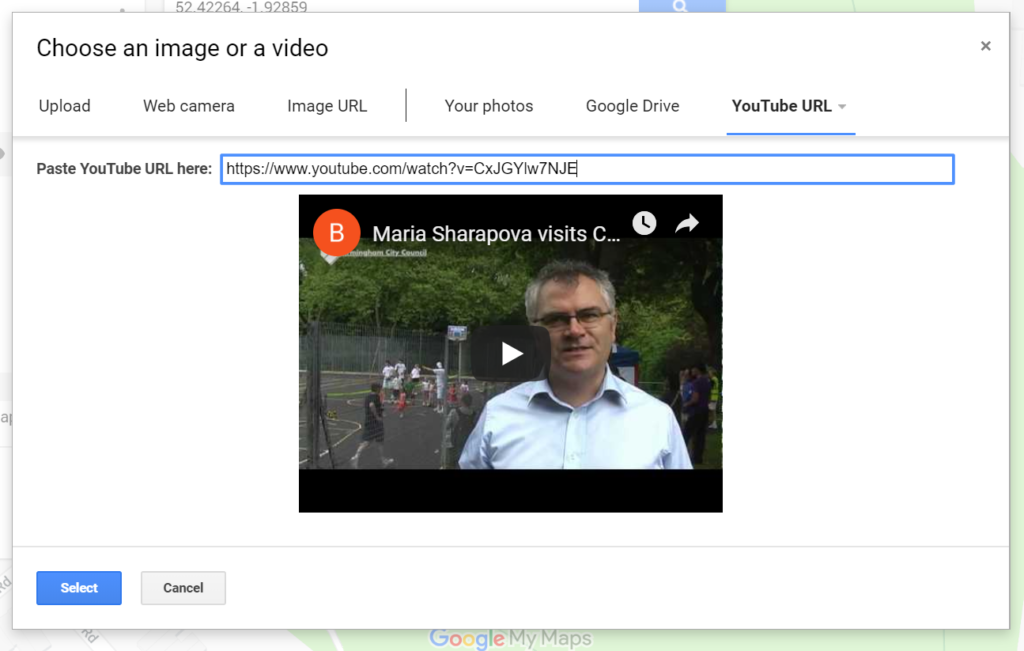
Your URL will look something like this “https://www.youtube.com/watch?v=CxJGYlw7NJE”
Once again, press the blue ‘select’ button to add the video to the map marker / point.
6. Updating to bespoke markers
You could have some specific markers designed for you map. If you want to change the choice of bespoke markers available for adding to the map do the following:
- Click on the map tab you want to change.
- If you don’t see a grey bar labeled “Configure map” above the map itself, click “Tools > Change map”.
- If “Feature map” is not highlighted in red, click it.
- Click the “Change feature styles” button.
- Click “Points > Marker icon” if it’s not already selected.
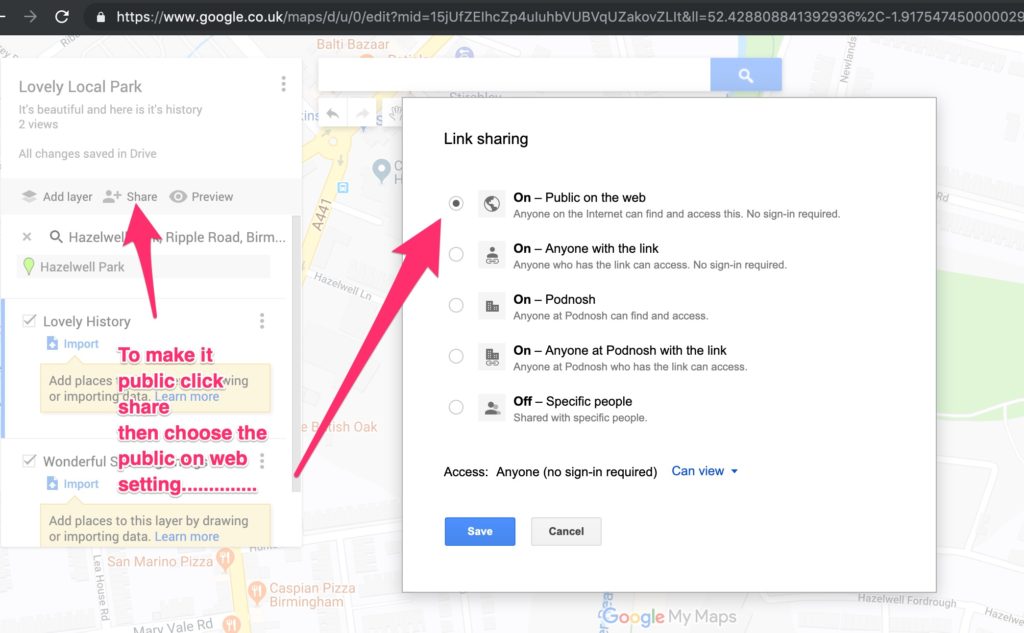
7. Making the Map Public:
This guide was written by Nick Booth and James Clarke of Podnosh in April 2019 (so may become out of date). It is part of a wider project set up by the Friends of Cotteridge Park to use mapping and other digital skills to tell the story of the park and archive their work. That work was funding by a grant from the National Lottery Heritage Fund.
![]()
Posted on 25th April 2019
Connect with us
@BOSFonline