Park Tech: How to add an Historic Timeline to your WordPress website
You will need:
1. A website built using WordPress
2. Access to add plugins to the website
3. A gmail address so you can create a google spreadsheet
4. Some patience – If it does not seem to work at first, the key is to re-read the instructions carefully.
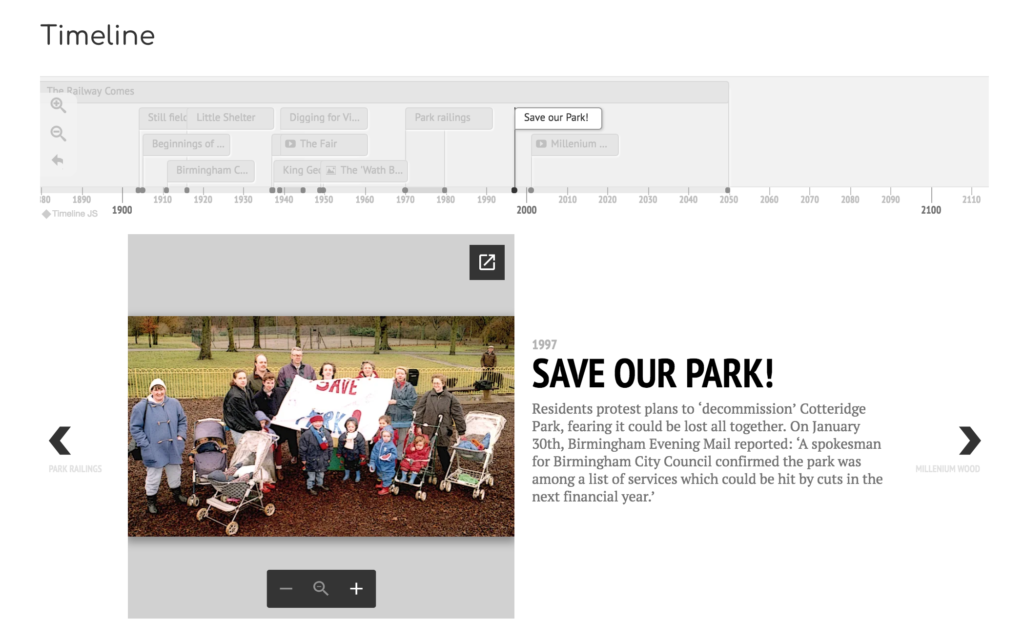
Image of Cotteridge Park’s Historic Timeline – found at: https://cotteridgepark.org.uk/history/timeline/
How To add a Timeline to your website (WordPress)
1. Creating a page for the Timeline
You will need to login into to your WordPress website and add a new page, call it timeline.
1.1 Installing the Timeline plugin
Go to add plugin on your WordPress website and search for Knight Lab TimelineJS plugin, if you can’t find a way to search for new plugins you probably don’t have the right admin access. Ask you admin to install Knight Lab TimelineJS – you can also find it here: https://en-gb.wordpress.org/plugins/knight-lab-timelinejs/
Then follow the instructions here (carefully):
https://timeline.knightlab.com/
You will need to be logged into your gmail account so you can take the spreadsheet template and install it on your own google sheets account. It’s that spreadsheet that you will update to add content to the Timeline.
You can rename the spreadsheet (for example you might want to call it Live – so you know it’s the one that you’re using) but don’t change the headings or columns. Publish it to the web – follow the instructions here: https://timeline.knightlab.com/
Add an event to the Timeline
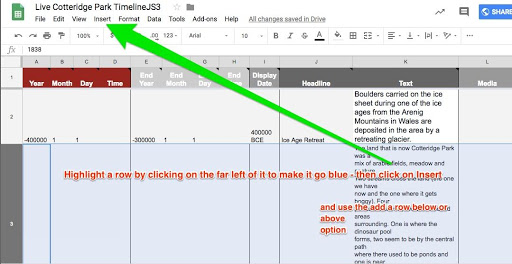
To add an event to the Timeline choose the right place (by date and time) and add a row to the spreadsheet. To add a row Click on the row above on the far right of the spreadsheet and then either go to insert and use add row below (or above depending on where you need it to be in the Timeline) or right click and the option to add a row above or below will come up.
You then add the details in the row, you don’t have to fill in all columns but you need to add a date, a headline, text to describe the event. It is also a good idea to add something in display date.
2. Adding an image to the spreadsheet so it shows in the Timeline
At the moment the best way to add an image is to add it to google drive and then publish it to the web. To do that you need to:
You will need to put the url, the web address for the image itself, into the spreadsheet in the media column.
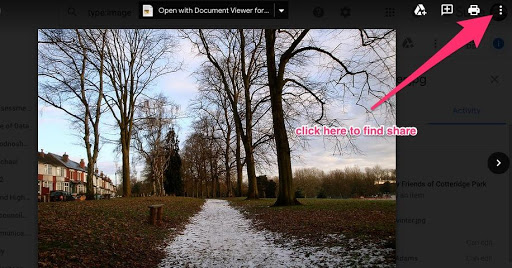
You need to use the sharing option on google docs, for each individual image.
‘Publish to the web’
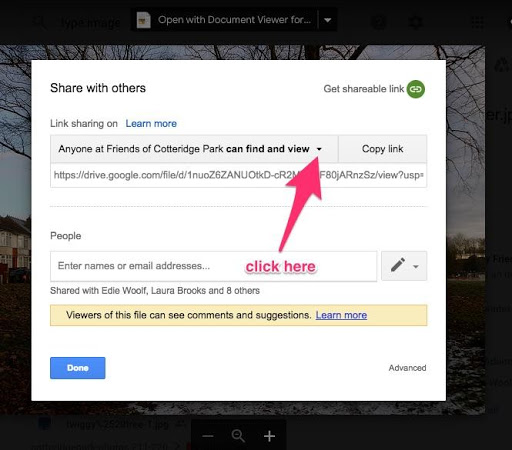
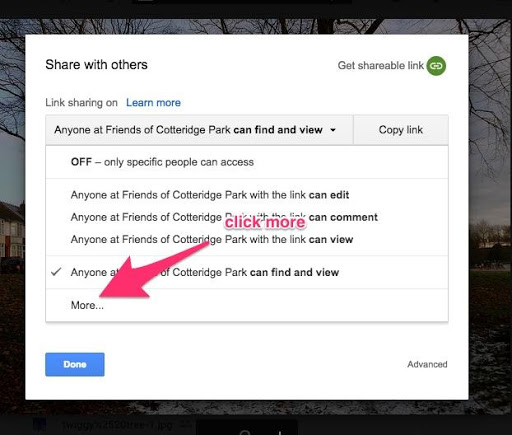
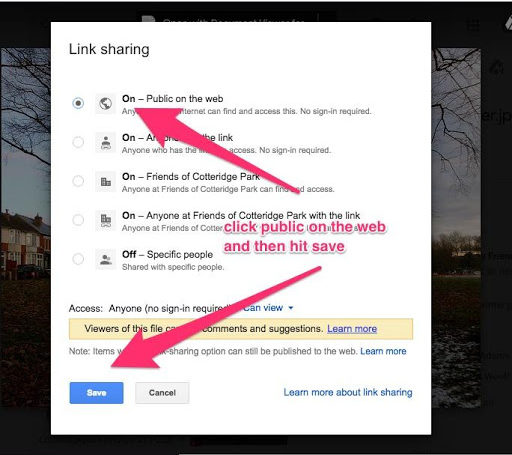
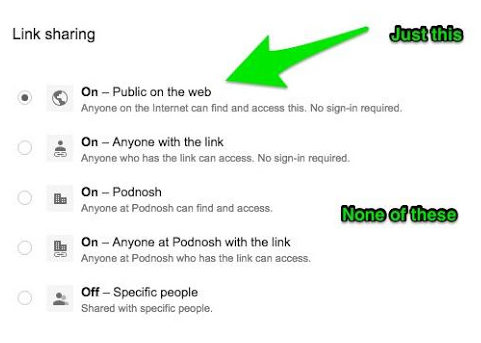
If the image doesn’t show check the link sharing settings, they should only publish to the web, not anything like “anyone at your organisation with the link can…”
3. To Publish the changes
If you keep adding dates the spreadsheet should automatically update the Timeline. But if you want to speed that up or check if something is working you need to publish the changes to the spreadsheet.
You need to access to two things,
1. The Live Timeline spreadsheet – logged in with your gmail account
2. The Timeline page on your website to refresh and see that the update has happened
If you have updated the spreadsheet with new information or changed the existing information you will need to unpublish it and publish it again.
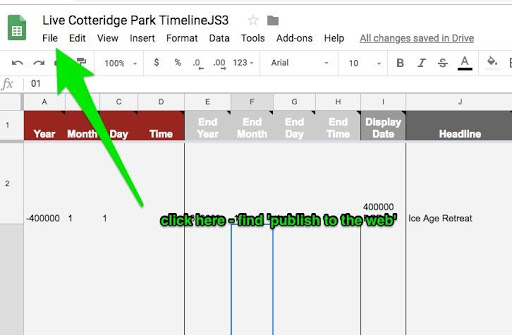
Step 1: First you have to un-publish… To do that – go to file in the top left hand corner of the Live timeline map spreadsheet
Find ‘publish to the web”
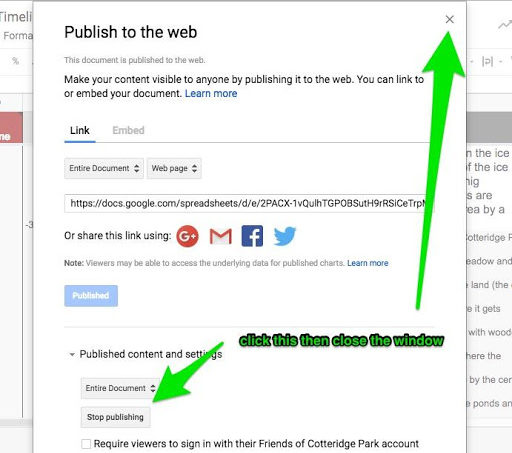
Click on that and a box will appear. At the bottom should be an option called “Stop publishing” – click that and when a box comes up saying are you sure, click ok. Now close the whole box (this is an important step) using the small cross at the top right-hand side. This has unpublished the spreadsheet – closing the box is important.
Step 2: Publish it again.
This is similar to what you were just doing.
Go to file in the top lefthand corner of the Live timeline map spreadsheet
Find ‘publish to the web”
Click on that and a box will appear. There is a blue box with the word Publish
Click Publish – and when a box comes up saying are you sure, click ok.
Now close the whole box (this is an important step) using the small cross at the top right hand side.
Now go back to the timeline page on your website and hit refresh. You should now be able to see the changes you’ve made to the spreadsheet.
4. Trouble shooting
I’m not seeing what I expect to see….
If it’s a missing image:
Check that the image you have linked to is fully publicly online and that you are linking to the image itself, not the page the image is on. To find the address of an image one way is to right click on the image itself and then select the option that says ‘copy image addresss’.
If it’s a missing entry
Are there extra lines in the spreadsheet – empty lines? Try deleting those, they sometimes interfere with the timeline.
The Spreadsheet won’t accept text?
Make sure it is only text, no bullets points or fancy stuff.
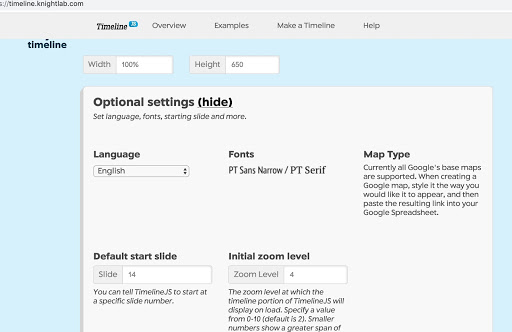
The Timeline doesn’t start where we expect it to
You want it to start on a certain entry – the chances are you’ve added new ones and it’s moved.
You will need to follow the instructions here again
https://timeline.knightlab.com/
To re-publish the timeline again. You will need to use the optional settings to change where the timeline starts:
This guide was written by Nick Booth and James Clarke of Podnosh in April 2019 (so may become out of date). It is part of a wider project set up by the Friends of Cotteridge Park to use mapping and other digital skills to tell the story of the park and archive their work. That work was funding by a grant from the National Lottery Heritage Fund.
![]()
Posted on 1st May 2019
Connect with us
@BOSFonline